May 05, 2025
Onboarding Web2 and Web3 Users Seamlessly with Privy
Recently, I developed a dApp, and to accommodate both Web2 and Web3 users, I chose Privy as the solution, because its doc states:
Privy builds authentication and wallet infrastructure to enable better products built on crypto rails.
Get started in minutes to onboard users with wallets, spin up self-custodial wallets for users, and securely sign transactions through your app.
Requirements
Although the docs mention that users can link multiple wallets and social accounts to a single Privy identity, my use case is much more straightforward:
- Users should be able to log in with an external wallet or social account (Google, Twitter, Telegram, Farcaster).
- They should be able to start transacting right away without managing accounts.
- It’s best to offer onramp first, since new wallets often start with no tokens. (especially for web2 users)
Reference
The Privy Demo is a great way for new developers. It allows anyone to explore Privy's capabilities and ease of use through the official app.
For those working with Ethereum wallets, I recommend checking out the Wagmi Demo, which integrates Privy with Wagmi’s React hooks to provide a smooth developer experience.
Usage
In my setup, I created three files in the providers folder: privyConfig.ts, wagmiConfig.ts, and PrivyProvider.tsx.
PrivyProvider.tsx
1import privyConfig from "./privyConfig"
2import wagmiConfig from "./wagmiConfig"
3
4const queryClient = new QueryClient()
5
6export default function PiggyPrivyProvider({ children }: { children: React.ReactNode }) {
7  return (
8    <PrivyProvider
9      appId={process.env.NEXT_PUBLIC_PRIVY_APP_ID as string}
10      config={privyConfig}
11    >
12      <QueryClientProvider client={queryClient}>
13        <WagmiProvider config={wagmiConfig}>{children}</WagmiProvider>
14      </QueryClientProvider>
15    </PrivyProvider>
16  )
17}
Since it’s the entry point for Privy, it should be concise. Configuration files are separated to make them easier to review and update.
privyConfig.ts
1import { type PrivyClientConfig, type WalletListEntry } from "@privy-io/react-auth"
2import isMobile from "is-mobile"
3
4import Logo from "@/assets/svgs/logo.svg"
5import { isCoinbaseWallet } from "@/utils"
6
7import { SCROLL_CHAIN } from "./wagmiConfig"
8
9const walletList: WalletListEntry[] = [
10  "metamask",
11  "okx_wallet",
12  "coinbase_wallet",
13  "wallet_connect",
14  "detected_ethereum_wallets",
15]
16
17const mobileWalletList: WalletListEntry[] = isCoinbaseWallet()
18  ? ["coinbase_wallet", "detected_ethereum_wallets"]
19  : ["detected_ethereum_wallets"]
20
21export const socialLoginMethodList: PrivyClientConfig["loginMethods"] = [
22  "farcaster",
23  "google",
24  "twitter",
25  "telegram",
26]
27
28const privyConfig: PrivyClientConfig = {
29  appearance: {
30    theme: "dark",
31    accentColor: "#F30378",
32    logo: Logo.src,
33    walletList: isMobile({ tablet: true }) ? mobileWalletList : walletList,
34  },
35  loginMethods: ["wallet", ...socialLoginMethodList],
36  embeddedWallets: {
37    ethereum: {
38      createOnLogin: "users-without-wallets",
39    },
40  },
41  externalWallets: {
42    coinbaseWallet: {
43      connectionOptions: "eoaOnly",
44    },
45  },
46  defaultChain: SCROLL_CHAIN,
47  supportedChains: [SCROLL_CHAIN],
48}
49
50export default privyConfig
walletList
They are grouped by device type. Specifically, it depends on whether the browser supports wallet plugins. As we all know (well, maybe just me) using WalletConnect on a mobile device can be a hassle. Mobile browsers like Chrome need to call the wallet app to connect and sign transactions. WalletConnect handles this reasonably well, but the overall experience still isn’t great.
On one hand, I prefer users on mobile browsers to use embedded wallets, which provide a more seamless user experience. On the other hand, if the user opens the app in the built-in browser of a wallet app, detected_ethereum_wallets will work, allowing them to use external wallets as well.
Then, a bug occurs.
In the Coinbase built-in browser, detected_ethereum_wallets doesn’t work as expected. The login modal doesn’t show the Coinbase Wallet option. Logs confirmed that window.ethereum is present in the Coinbase browser environment.
Finally, I decided to detect whether the user is in the Coinbase built-in browser with the following code:
1export const isCoinbaseWallet = () => {
2  if (typeof window === "undefined") {
3    return false
4  }
5  return typeof window.ethereum !== "undefined" && window.ethereum?.isCoinbaseWallet
6}
It works.
loginMethods
I chose Farcaster, Google, Twitter, and Telegram as the supported social accounts for my dapp. Interactions with Google and Twitter are smooth and reliable. However, there are issues when interacting with Telegram and Farcaster.
Telegram
According to the instructions, I created a Telegram bot and entered the bot token in the Privy dashboard.
I was able to see the Twitter OAuth page, successfully entered my phone number, and submitted the verification code I received.
However, I never received the confirmation message on Telegram, like this:
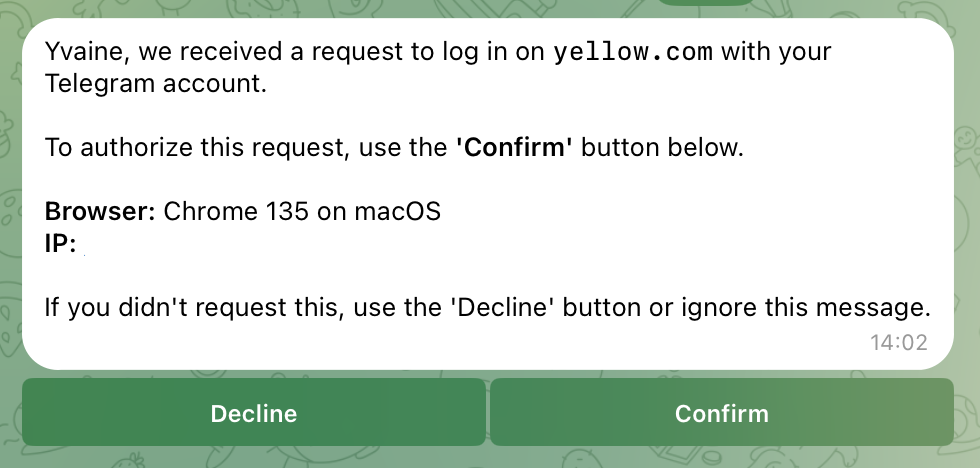
However, after logging in via yellow (thanks a lot!), I was able to authorize my website to access the user’s Telegram information. This means I can now use Telegram login on my website.
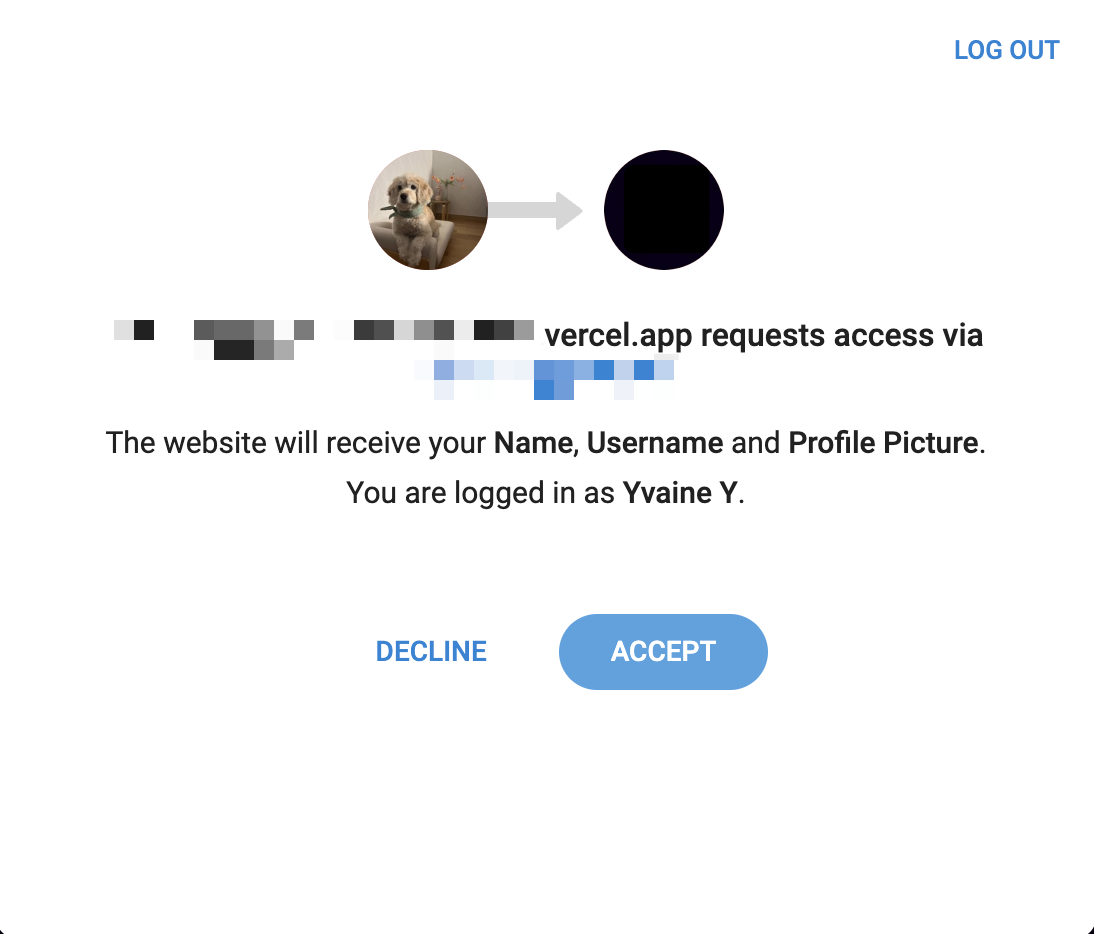
So weird. After a lot of research, I found the issue was caused by the domain I was using, which ended with vercel.app.
Here’s a Stack Overflow post describing the same problem.
After switching to the official domain, everything started working.
Farcaster
When you create a Farcaster account on Warpcast, the system automatically generates an Ethereum wallet for you.
This wallet is mainly used for in-app actions on Warpcast, such as interacting with Frames.
You can also import other wallet accounts into Warpcast and link them to your current Farcaster account.
Now, let’s take a closer look at this option under Farcaster.
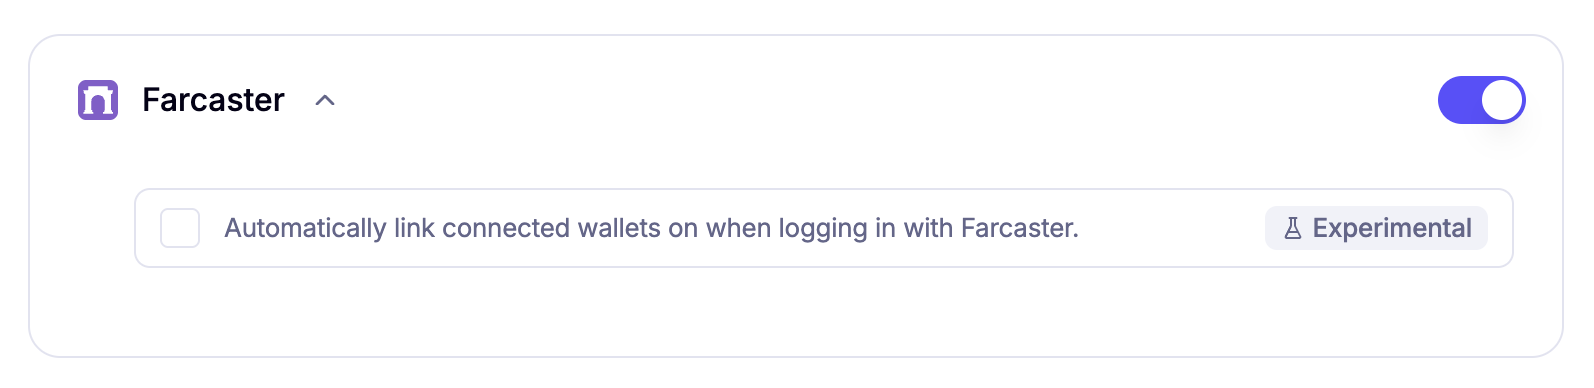
When this option is enabled(Automatically link connected wallets when logging in with Farcaster), it means that all wallets linked to the user’s Farcaster account will automatically be added to user.linkedAccounts during login.
It’s worth noting that user.wallet.address will be set to the default wallet address associated with the Farcaster account.
It’s frustrating, because I applied createOnLogin: "users-without-wallets", which means Privy should only create an embedded wallet if the user doesn’t already have one.
However, in this case, the wallet linked through Farcaster isn’t usable in the browser, and it also prevents Privy from creating a new embedded wallet.
As a result, the user can’t do anything.
Since the default wallet of a Farcaster account has no walletClientType value—whereas embedded wallets use privy, and others might use metamask, rainbow, coinbase_wallet, and so on—here’s one way to handle the issue.
1import { useCreateWallet, useLogin } from "@privy-io/react-auth"
2
3const { createWallet } = useCreateWallet()
4const { login: privyLogin } = useLogin({
5  onComplete: ({ user, isNewUser, loginMethod }) => {
6    if (user.linkedAccounts.every((account: any) => !account.walletClientType)) {
7      createWallet()
8    }
9  },
10})
Looking back at the goal, I mainly wanted users to be able to send transactions as quickly as possible, so linking additional accounts wasn’t a priority.
That’s why I didn’t enable this option.
As a result, Privy does create an embedded wallet for the Farcaster account.
Nice.
wagmiConfig.ts
1import { createConfig } from "@privy-io/wagmi"
2import { scroll, scrollSepolia } from "viem/chains"
3import { Transport, http } from "wagmi"
4
5export const SCROLL_CHAIN =
6  process.env.NEXT_PUBLIC_SCROLL_CHAIN_TYPE === "mainnet" ? scroll : scrollSepolia
7
8const transports = {
9  [SCROLL_CHAIN.id]: http(),
10} as Record<534351 | 534352, Transport>
11
12export const wagmiConfig = createConfig({
13  chains: [SCROLL_CHAIN],
14  transports,
15})
It’s better to place the wagmiConfig in a separate file.
In addition to using it with PrivyProvider, I also use it to build a contract.ts file that centralizes all on-chain interactions.
This setup centralizes contract addresses, keeping the codebase cleaner, more maintainable, and easier to reference.
1import {
2  readContract,
3  simulateContract,
4  waitForTransactionReceipt,
5  writeContract,
6} from "@wagmi/core"
7
8import ProxyABI from "@/assets/abis/proxy.json"
9import wagmiConfig from "@/providers/wagmiConfig"
10
11// read contract
12export const getData = async (param1: number, param2: boolean): Promise<Data> => {
13  const data = await readContract(wagmiConfig, {
14    address: process.env.NEXT_PUBLIC_PROXY_ADDRESS as Address,
15    abi: ProxyABI,
16    functionName: "getData",
17    args: [param1, param2],
18  })
19  return data
20}
21
22// write contract
23
24export const sendTransaction = async (walletAddress: Address, data: number) => {
25  try {
26    const { request } = await simulateContract(wagmiConfig, {
27      account: walletAddress,
28      address: process.env.NEXT_PUBLIC_PROXY_ADDRESS as Address,
29      abi: ProxyABI,
30      functionName: "sendTransaction",
31      args: [walletAddress, data],
32    })
33
34    const hash = await writeContract(wagmiConfig, request)
35    const isConfirmed = await waitForTransaction(hash)
36
37    if (!isConfirmed) {
38      throw new Error("Failed to buy a ticket")
39    }
40    return true
41  } catch (error: any) {
42    if (isUserRejectedError(error)) {
43      return false
44    }
45    throw error
46  }
47}
48
49// wait for tx receipt
50export const waitForTransaction = async (hash) => {
51  const receipt = await waitForTransactionReceipt(wagmiConfig, { hash })
52  if (receipt.status === "success") {
53    return true
54  }
55  return false
56}
In client components, we only need to focus on front-end interactions, handling loading states, success, and errors.
The actual business logic(related to contract) is imported from contract.ts, which keeps the components clean and focused.
1
2import { useMutation } from "@tanstack/react-query"
3import { sendTransaction } from "@/services/contract"
4
5const { mutateAsync: handleEvent, isPending } = useMutation({
6  mutationFn: async ({ walletAddress, data }: { walletAddress: Address; roundData?: RoundData }) => {
7    const isSuccess = await sendTransaction(walletAddress, data)
8    if (isSuccess) {
9      ...
10    }
11  },
12  onError: error => {
13      console.log(error)
14      ...
15  }
16})
Privy login vs Wagmi connect
As shown clearly in the wagmi online demo, Privy login and wagmi connect are two separate flows.
Logging out from Privy does not automatically mean disconnecting from wagmi.
There are three hooks to pay attention to:
1import { usePrivy, useWallets } from "@privy-io/react-auth"
2import { useAccount } from "wagmi"
3
4const { ready, user } = usePrivy()
5const { ready: connectorReady, wallets } = useWallets()
6const { address } = useAccount()-
usePrivy
ready indicates whether the Privy SDK is ready to use. user contains user data fetched from Privy backend.
-
useWallets
ready tells whether Privy has fully processed all external and embedded EVM wallet connections. When it’s true, wallets contains the list of all currently connected wallets.
-
useAccount
address represents the address of the currently active wallet address. The corresponding wallet (from wallets) is used by wagmi as the active walletClient. You can switch the active wallet using useSetActiveWallet.
1import { useWallets } from "@privy-io/react-auth"
2import { useSetActiveWallet } from "@privy-io/wagmi"
3
4const { wallets } = useWallets()
5
6const embeddedWallet = wallets.find((wallet) => wallet.walletClientType === "privy")
7
8// Switch to embedded wallet
9await setActiveWallet(embeddedWallet)
When user exists, wallets may not necessarily be available.
Even when wallets are present, address can still be undefined.
Since some on-chain actions require the active address as a parameter, I use !address as one of the conditions for disabling buttons.
As a result, after logging out, it’s necessary to manually call the disconnect function to ensure that useAccount returns undefined for address.
1import { useLogout } from "@privy-io/react-auth"
2import { useDisconnect } from "wagmi"
3
4const { disconnect } = useDisconnect()
5const { logout } = useLogout({
6  onSuccess: () => {
7    disconnect()
8  },
9})
Additionally, I added a global check to ensure that the active address truly belongs to the currently logged-in Privy user.
Given my use case,
Each Privy user is associated with only one wallet, either external or embedded
the following check is sufficient.
1import { usePrivy, useWallets } from "@privy-io/react-auth"
2import { SCROLL_CHAIN } from "@/providers/wagmiConfig"
3import { useAccount } from "wagmi"
4
5...
6
7const { user } = usePrivy()
8const { ready: walletsReady, wallets } = useWallets()
9
10const { chainId } = useAccount()
11
12useEffect(() => {
13  if (user && walletsReady && !wallets.find(wallet => wallet.address === user?.wallet?.address)) {
14    changeAccountWarningModalVisible(true)
15  } else {
16    changeAccountWarningModalVisible(false)
17  }
18}, [user, walletsReady, wallets])
19
20
21useEffect(() => {
22  if (chainId && chainId !== SCROLL_CHAIN.id) {
23    changeNetworkWarningModalVisible(true)
24  } else {
25    changeNetworkWarningModalVisible(false)
26  }
27}, [chainId])
Wrapping up
So far, we’ve explored Privy’s core features in action. It’s a solid demonstration of how new users can quickly log in to a dApp and start sending transactions with minimal friction.
By integrating with wagmi and organizing on-chain logic within a dedicated contract.ts file, we’ve also achieved a clean separation between front-end interactions and business logic, making the codebase easier to maintain and scale in the future.
What's Next
All of Privy’s login methods converge into a single, unified Privy user.
Once logged in, users can sign in again on a new device without needing to import a private key or go through extra steps (yes, I’m looking at you, most Web3 wallets).
I’m genuinely curious about the magic behind it all. To use Privy more effectively, I will dive into how it works under the hood.